Screenshots
Learn more about taking screenshots when an error occurs. Sentry pairs the screenshot with the original event, giving you additional insight into issues.
Sentry makes it possible to automatically take a screenshot and include it as an attachment when a user experiences an error, an exception or a crash.
This feature is only available for SDKs with a user interface, like the ones for mobile and desktop applications. It's also limited by whether taking a screenshot is possible or not. For example, in some environments, like native iOS, taking a screenshot requires the UI thread, which often isn't available in the event of a crash. Another example where a screenshot might not be available is when the event happens before the screen starts to load. So inherently, this feature is a best effort solution.
Because screenshots may contain PII, they are an opt-in feature.
Enable screenshots by setting the attachScreenshot option to true and wrap your root widget with SentryWidget.
await SentryFlutter.init(
(options) {
options.attachScreenshot = true;
},
appRunner: () => runApp(
SentryWidget(
child: MyApp(),
),
),
);
By default, Flutter limits screenshot captures to once every 2 seconds to minimize performance impact. While this debounce interval cannot be changed, you can customize capture behavior by implementing the beforeCaptureScreenshot callback in your SentryFlutterOptions.
This callback gives you fine-grained control over screenshot captures based on event and hint data, allowing you to implement conditional logic.
Return true to capture the screenshot, or false to skip it.
The debounce flag is true if the debounce is active and would prevent the screenshot from being captured. If you want to capture screenshots regardless of the debounce, you ignore the debounce flag.
await SentryFlutter.init((options) {
options.beforeCaptureScreenshot = (event, hint, shouldDebounce) async {
// If shouldDebounce is active, skip capturing
if (shouldDebounce) {
return false;
}
// Capture screenshot if it's a fatal event
return event.level == SentryLevel.fatal;
};
});
The masking feature is enabled by default for screenshots. If you want to disable or configure the masking feature, you can do so by adjusting the options.experimental.privacy option.
Modifying this parameter will also affect masking for Session Replay.
Masking in the Sentry Flutter SDK is based on Widget types, e.g. Image, not the string representation of the type (i.e. we check whether a widgetInstance should be masked by checking if (widgetInstance is Image) instead of if (widgetInstance.runtimeType == 'Image')). This means we can ensure masking works regardless of obfuscation in release builds and also works for subclasses. However, it also means we can only automatically mask widgets that are part of the Flutter SDK itself.
We cannot mask widgets defined in various 3rd-party packages (because the type is not known in the Sentry Flutter SDK), even though many should be masked.
Therefore, you need to consider the widgets your application uses and ensure they're masked correctly with custom masking rules. Examples of widgets that usually should be masked include (but are not limited to): VideoPlayer, WebView, Chart, etc.
You can tune this and add custom masking rules to fit your needs by adjusting the configuration in options.experimental.privacy. For example, you can explicitly mask or unmask widgets by type, or you can even have a callback to decide whether a specific widget instance should be masked:
  options.privacy.mask<IconButton>();
  options.privacy.unmask<Image>();
  options.privacy.maskCallback<Text>(
      (Element element, Text widget) =>
          (widget.data?.contains('secret') ?? false)
              ? SentryMaskingDecision.mask
              : SentryMaskingDecision.continueProcessing);
Mask all text content. Draws a rectangle of text bounds with text color on top. Currently, only Text and EditableText Widgets are masked.
Mask content of all images. Draws a rectangle of image bounds with image's dominant color on top. Currently, only Image widgets are masked.
Mask asset images coming from the root asset bundle.
Mask given widget type T (or subclasses of T) in the screenshot. Note: masking rules are called in the order they're added so if a previous rule already makes a decision, this rule won't be called.
You can find more details in the documentation for each method.
If you find that data isn't being masked with the default settings, please let us know by creating a GitHub issue.
To disable masking for Screenshots and Session Replay (not to be used on applications with sensitive data):
  options.experimental.privacy.maskAllText = false;
  options.experimental.privacy.maskAllImages = false;
If one is available, you'll see a thumbnail of the screenshot when you click on a specific issue from the Issues page.
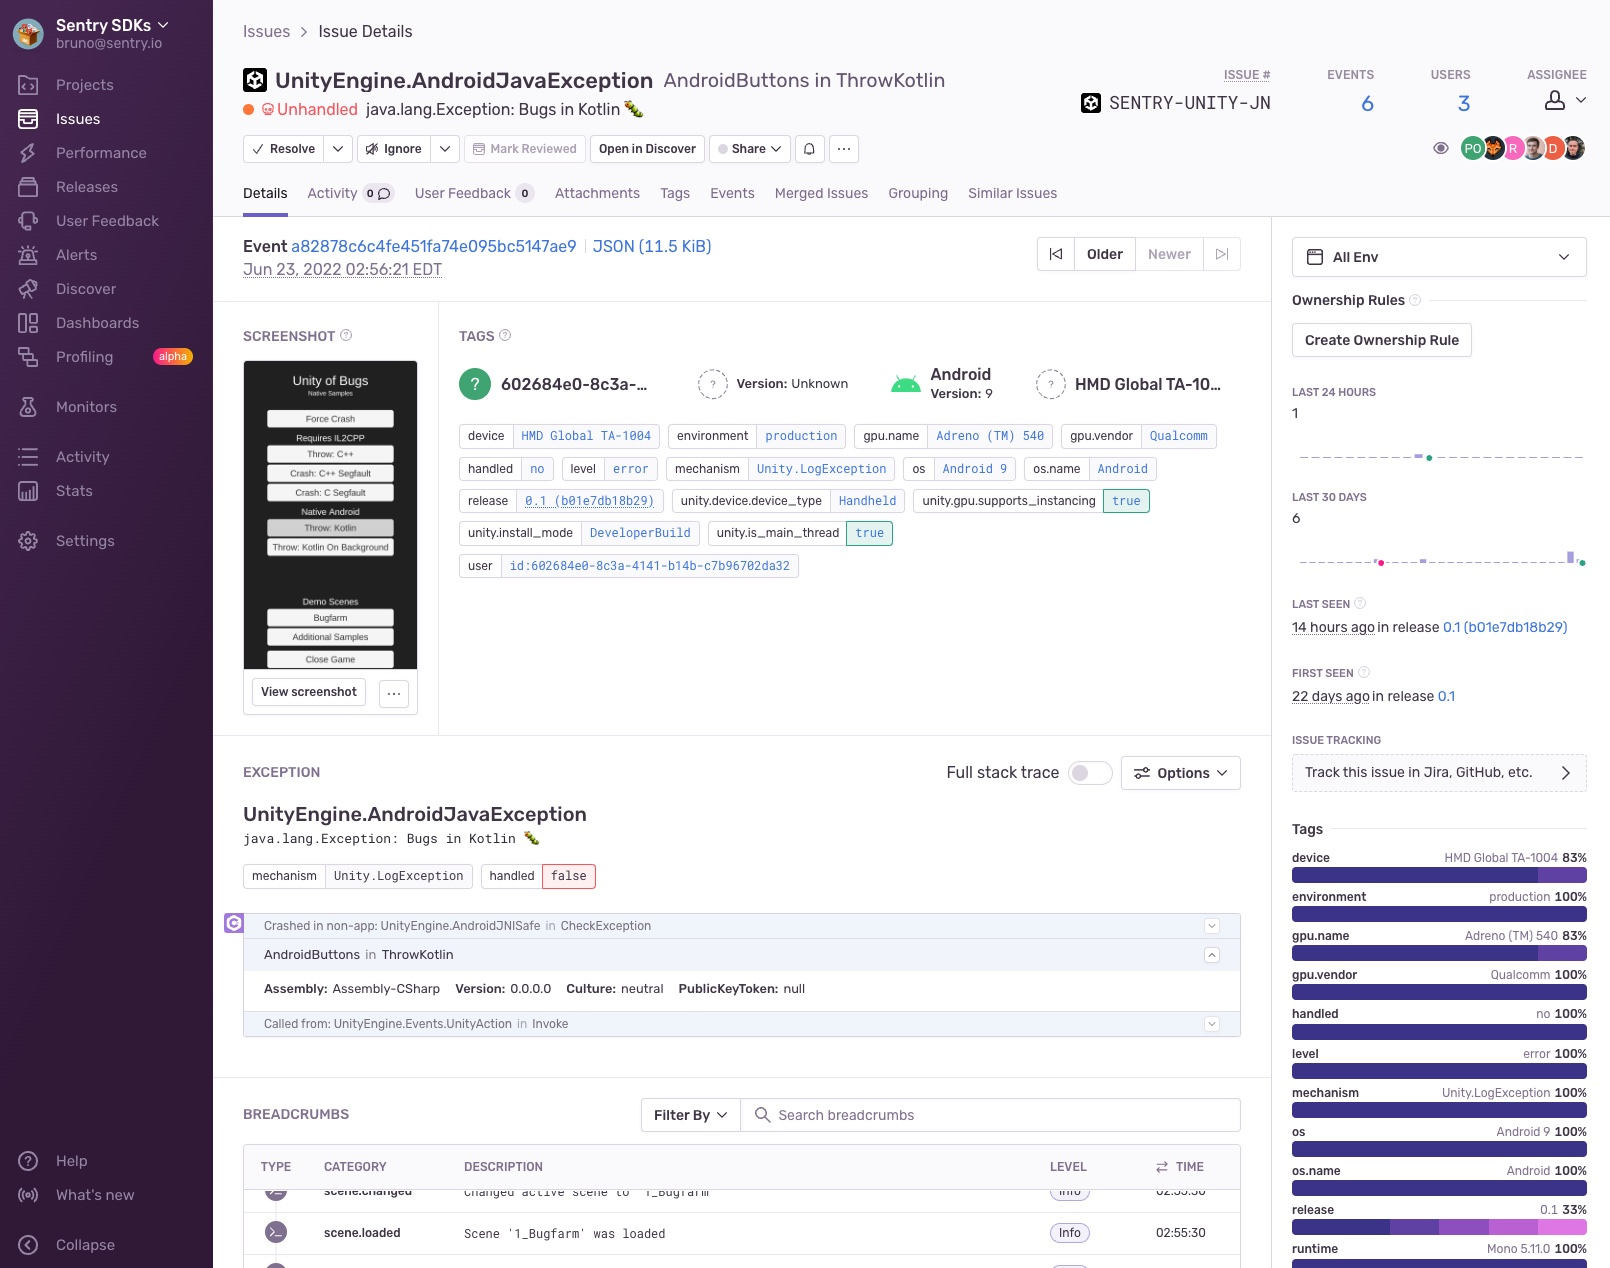
Once you've clicked on the event ID of a specific issue, you'll be able to see an overview of all the attachments as well as associated events in the "Attachments" tab.

Our documentation is open source and available on GitHub. Your contributions are welcome, whether fixing a typo (drat!) or suggesting an update ("yeah, this would be better").